Back to school bunny

For some of you, you are already singing the praises of school days being back. For some of us, we still have a month of summer… but, that means some more time at the pool and taking a few more small trips!

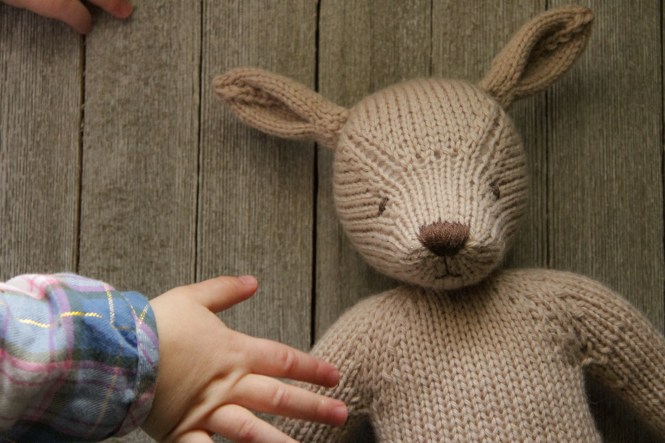
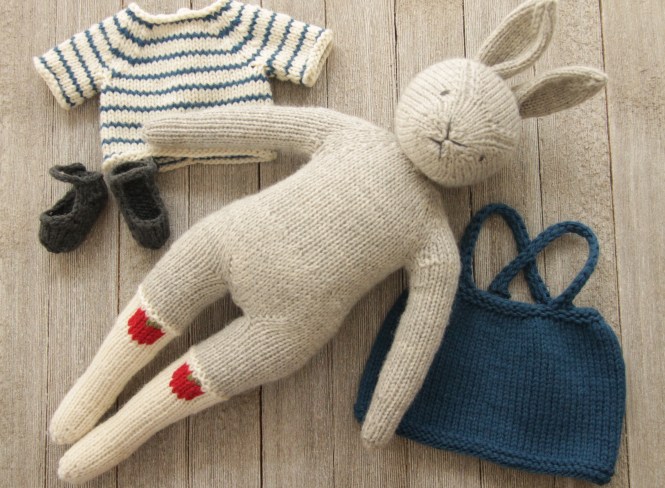
I made a back to school bunny to celebrate the occasion! Here she is!

1B10FD4F-0D7E-4881-97E2-9D710C1633EE.JPG

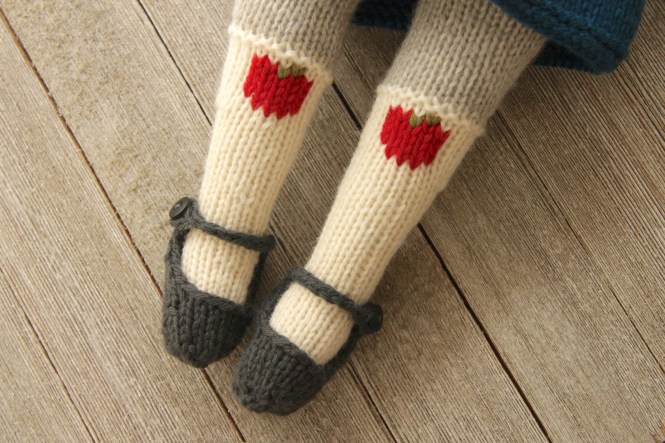
Her short-sleeved shirt, skirt with straps, and shoes are all removable.

IMG_4270.JPG

As pattern suggests, it is recommended to use the same yarn for doll and clothes to ensure the best fit, however, you can knit a swatch of the doll yarn on a size bigger needle, then gauge it and match a yarn exactly.

Materials used:

Doll: Fur-Cascade 220 Aran in ‘Aspen Heather,’ knitted on sz 5 needles; socks-Cascade 220 Aran in ‘Natural,’ knitted on sz 5 needles

Skirt with straps: Quince and Co Lark in ‘River,’ sz 7 needles

Shirt: Quince and Co Lark in ‘River’ and ‘Egret,’ sz 7 needles

Shoes: Quince and Co Lark ‘Smoke,’ sz 7 needles

Apple knee pads: Quince and Co Lark in ‘Peaks Ferry’ and ‘Snap Pea,’ duplicate stitched


The stocking instructions are included in the pattern. I’ve attached the apple knee pads below, which can be duplicate stitched onto the knee. Just ensure that the knee pads are centered on the front of the leg and even with the opposite one.

The shirt pattern will soon be available as well! Enjoy!

IMG_2445.jpgIMG_4258.JPG

Advertisement

Deer update!

Hey there!

We have new patterns coming tomorrow for our Dress Up Dolls, but I did make another variation of my pre-existing deer pattern. I made this guy:

IMG_4070.jpg

I followed the entire pattern for the body and head, also doing the muzzle color-change where specified in the pattern. Once the ears were knitted, prior to attaching to head, I duplicate knit a white color in the center of the ear, tapering up towards the top. I also modified the small antlers in the pattern and made them into “Y” antlers, which I have included that change below.

“Y” Antlers (make 2)

Use the same yarn (different color) and needle size in which you used to create the doll.

You will also need at least 6″ of waste yarn or a small safety pin.

CO 5 sts, leaving an 8″ tail. Place BOR sm and join to knit in the rnd as follows:

Rnds 1-4: Knit 4 rnds

Rnd 5: kfb, k2, kfb, k1. (7sts)

Rnd 6: k2, slip next 4sts onto waste yarn without working them, k last st (3sts)

Rnd 7: knit the 3sts

Rnd 8: K2tog, k1. (2sts)

Rnd 9: k2tog. Break yarn and thread onto tapestry needle. Weave in.

To create the 2nd ‘spike’ slip the 4 live sts off of waste yarn and onto needles. Attach yarn leaving a 6″ tail and work in the rnd as follows:

Rnds 1-3: Knit 3 rnds

Rnd 4: (k2tog)2x (2sts)

Rnd 5: k2tog. Break yarn and thread onto tapestry needle. Weave in end.

Use the 2nd CO tail to darn the hole at the center of the “Y.” Weave in end.

Use the 1st CO tail to sew the antler onto head at inner edge of ear. Weave in end.


Additional notes: the materials I used in created the deer above–

Fur: Cascade 220 Chocolate Heather on needle sz 5

White Accent: Cascade 220 White

Antlers: Cascade 220 Natural


Large Multi Stripe Sweater–Quince and Co “Lark” on sz 7 needles, colors: egret, sedum, audouin, bird’s egg, bark.

Merry Knitmas!

Yesterday was a bit of a cliffhanger, but I feel like it was obvious enough. We’ve got new patterns!

I decided to make a line of Dress Up Dolls patterns. Say you are a knitter and love our items, but they just aren’t in the budget. Well now, you can make one for yourself! They are a more simplified version of my shrunken wool rabbits that I’ve been creating lately, but they still have hips and feet and shoulders and beautiful heads! Another bonus: they are knitted in the round! Makes knitting a breeze. No mountain of body parts waiting for their seams to be sewn up and attached. They look beautiful dressed and undressed.

IMG_2722

The pattern is a standard deer: one color, no muss no fuss. So if you’re still a kind-of new knitter, you can do this! If you would like to venture out, you can change colors like I did. I simply knitted the muzzle a different color (tip included in pattern), added antlers (also included in pattern), embroidered on some spots and ‘hairs’ in the ears and voila! Rudolph! My daughter went nuts over him.

IMG_2730

I also bought a skein of a mohair lace weight and knitted it together with my wool to create a fuzzier doe:

IMG_2709.jpg

ALSO, You can see they have little sweaters on–that is also available as a pattern! It was so easy to make; I foresee a boatload of beautifully detailed sweaters in the future! The pattern is for a simple, single-colored sweater. However, as you can see, it makes a great base for being creative. I double-knit in a nordic design on one. I embroidered little holly cluster polka dots onto another. I made Rudolph’s sweater striped! Details for the stripes  included in pattern. I can’t wait to see all of the different finishes!

***Please note, I created this pattern as just to be knitted, not shrunken as well. If you do decide to shrink it, it will look completely different than this! I do not use these designs for my shrunken wool dolls. I merely created a pattern to look similar to those. ***

I wasn’t really sure of when I was going to offer these patterns, but I figured no better time than the present! It may be a little bit like offering in the eleventh hour, but they don’t need to be holiday deer. There’s always New Year’s, Valentine’s Day, Easter, birthdays, nightly toy knitting, or just ’cause! So grab these patterns at our Etsy shop; more are already in the works!

IMG_2670