Back to school bunny

For some of you, you are already singing the praises of school days being back. For some of us, we still have a month of summer… but, that means some more time at the pool and taking a few more small trips!

I made a back to school bunny to celebrate the occasion! Here she is!

1B10FD4F-0D7E-4881-97E2-9D710C1633EE.JPG

Her short-sleeved shirt, skirt with straps, and shoes are all removable.

IMG_4270.JPG

As pattern suggests, it is recommended to use the same yarn for doll and clothes to ensure the best fit, however, you can knit a swatch of the doll yarn on a size bigger needle, then gauge it and match a yarn exactly.

Materials used:

Doll: Fur-Cascade 220 Aran in ‘Aspen Heather,’ knitted on sz 5 needles; socks-Cascade 220 Aran in ‘Natural,’ knitted on sz 5 needles

Skirt with straps: Quince and Co Lark in ‘River,’ sz 7 needles

Shirt: Quince and Co Lark in ‘River’ and ‘Egret,’ sz 7 needles

Shoes: Quince and Co Lark ‘Smoke,’ sz 7 needles

Apple knee pads: Quince and Co Lark in ‘Peaks Ferry’ and ‘Snap Pea,’ duplicate stitched


The stocking instructions are included in the pattern. I’ve attached the apple knee pads below, which can be duplicate stitched onto the knee. Just ensure that the knee pads are centered on the front of the leg and even with the opposite one.

The shirt pattern will soon be available as well! Enjoy!

IMG_2445.jpgIMG_4258.JPG

Advertisement

Deer update!

Hey there!

We have new patterns coming tomorrow for our Dress Up Dolls, but I did make another variation of my pre-existing deer pattern. I made this guy:

IMG_4070.jpg

I followed the entire pattern for the body and head, also doing the muzzle color-change where specified in the pattern. Once the ears were knitted, prior to attaching to head, I duplicate knit a white color in the center of the ear, tapering up towards the top. I also modified the small antlers in the pattern and made them into “Y” antlers, which I have included that change below.

“Y” Antlers (make 2)

Use the same yarn (different color) and needle size in which you used to create the doll.

You will also need at least 6″ of waste yarn or a small safety pin.

CO 5 sts, leaving an 8″ tail. Place BOR sm and join to knit in the rnd as follows:

Rnds 1-4: Knit 4 rnds

Rnd 5: kfb, k2, kfb, k1. (7sts)

Rnd 6: k2, slip next 4sts onto waste yarn without working them, k last st (3sts)

Rnd 7: knit the 3sts

Rnd 8: K2tog, k1. (2sts)

Rnd 9: k2tog. Break yarn and thread onto tapestry needle. Weave in.

To create the 2nd ‘spike’ slip the 4 live sts off of waste yarn and onto needles. Attach yarn leaving a 6″ tail and work in the rnd as follows:

Rnds 1-3: Knit 3 rnds

Rnd 4: (k2tog)2x (2sts)

Rnd 5: k2tog. Break yarn and thread onto tapestry needle. Weave in end.

Use the 2nd CO tail to darn the hole at the center of the “Y.” Weave in end.

Use the 1st CO tail to sew the antler onto head at inner edge of ear. Weave in end.


Additional notes: the materials I used in created the deer above–

Fur: Cascade 220 Chocolate Heather on needle sz 5

White Accent: Cascade 220 White

Antlers: Cascade 220 Natural


Large Multi Stripe Sweater–Quince and Co “Lark” on sz 7 needles, colors: egret, sedum, audouin, bird’s egg, bark.

Merry Knitmas!

Yesterday was a bit of a cliffhanger, but I feel like it was obvious enough. We’ve got new patterns!

I decided to make a line of Dress Up Dolls patterns. Say you are a knitter and love our items, but they just aren’t in the budget. Well now, you can make one for yourself! They are a more simplified version of my shrunken wool rabbits that I’ve been creating lately, but they still have hips and feet and shoulders and beautiful heads! Another bonus: they are knitted in the round! Makes knitting a breeze. No mountain of body parts waiting for their seams to be sewn up and attached. They look beautiful dressed and undressed.

IMG_2722

The pattern is a standard deer: one color, no muss no fuss. So if you’re still a kind-of new knitter, you can do this! If you would like to venture out, you can change colors like I did. I simply knitted the muzzle a different color (tip included in pattern), added antlers (also included in pattern), embroidered on some spots and ‘hairs’ in the ears and voila! Rudolph! My daughter went nuts over him.

IMG_2730

I also bought a skein of a mohair lace weight and knitted it together with my wool to create a fuzzier doe:

IMG_2709.jpg

ALSO, You can see they have little sweaters on–that is also available as a pattern! It was so easy to make; I foresee a boatload of beautifully detailed sweaters in the future! The pattern is for a simple, single-colored sweater. However, as you can see, it makes a great base for being creative. I double-knit in a nordic design on one. I embroidered little holly cluster polka dots onto another. I made Rudolph’s sweater striped! Details for the stripes  included in pattern. I can’t wait to see all of the different finishes!

***Please note, I created this pattern as just to be knitted, not shrunken as well. If you do decide to shrink it, it will look completely different than this! I do not use these designs for my shrunken wool dolls. I merely created a pattern to look similar to those. ***

I wasn’t really sure of when I was going to offer these patterns, but I figured no better time than the present! It may be a little bit like offering in the eleventh hour, but they don’t need to be holiday deer. There’s always New Year’s, Valentine’s Day, Easter, birthdays, nightly toy knitting, or just ’cause! So grab these patterns at our Etsy shop; more are already in the works!

IMG_2670

Some kind of segue

You know, it’s been a while. This year, for us, has been a period of  trying to ‘figure ourselves out’ in a business-focused aspect. For me, I previously wasn’t as drawn to shrinking up my dolls after knitting them because I saw the incredible amount of tedious work it took for my mom to perfect the technique. However, the finished product is unlike any other doll I’ve ever held.  To me, it is the highest form of doll making that aims at the longevity of the life of the doll, also allowing for daily use, and holding up to even the most brutal play my young daughter has had to offer. This year, I was drawn to work in that avenue of art. I mean, look at the finished product! No seams, no loose stitches, no misshaping.

871579bd7c02b2053fa4fd06ccac619ae459fda7

For those who are new here, this technique requires that you create the entire doll out of wool yarn by crocheting or knitting, then agitate it with water and soap and pressure over and over until it shrinks and is thick and firm but fluffy and springy.  This incredible form of art takes a lot of time, as I’ve stated over and over previously. So here’s the deal. I worked tirelessly with my mom’s guidance and I was able to create many dolls this year. Here’s a few:

IMG_2150IMG_2600

IMG_1337.JPG

0666CC5F-CEE9-4CD7-BF69-A39B9AB34BBB.JPG

Yes, those are knitted-then-shrunken dolls wearing tiny skirts and tiny knitted cabled and fair isle sweaters, wearing hand-stitched boots and Maryjanes. I loved holding each one in my hands when I was finished with them. Each unique in their own way! So I decided, I would like to switch gears and offer something that allows other knitters to become creative and make their own unique items using a sort-of template. I’ll just leave it at that and share more very soon! Thanks for checking in!

XO, Rhonda

What the fuzz?

Felting? Fulling? What is it?!? We decided to put together a little ‘infomercial’ on what sets our products apart and what it is that we actually do.

I believe it should also be noted that that some folks may have been attempting to confuse what we do with wet felting. Wet felting is basically using the raw, unspun wool and turning it into a felt sheet. This is nothing like our process. If it does not say fulled or seamless shrunken wool then it is not created the same.

What it takes to make.

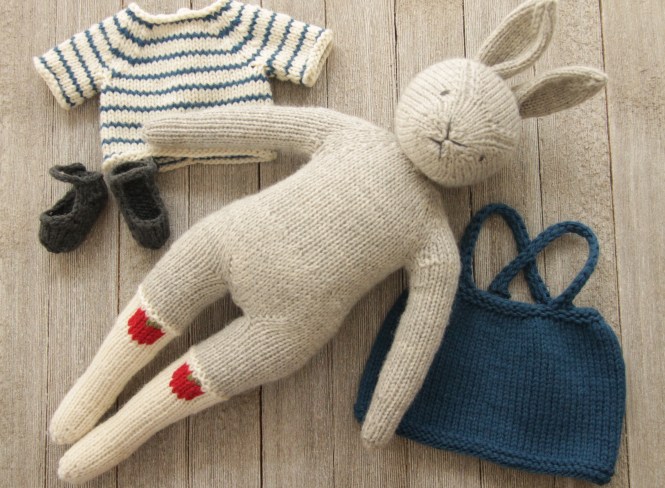
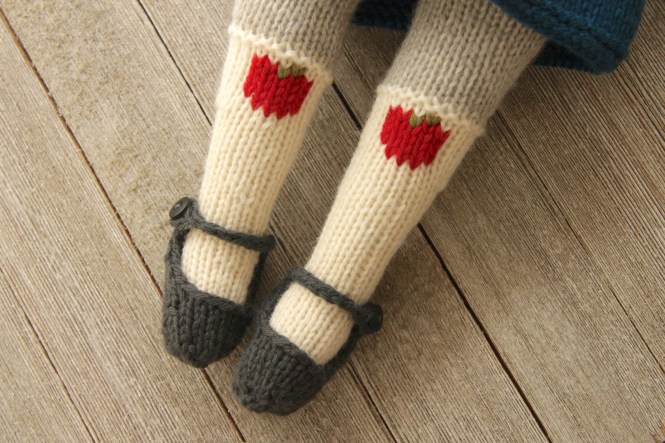
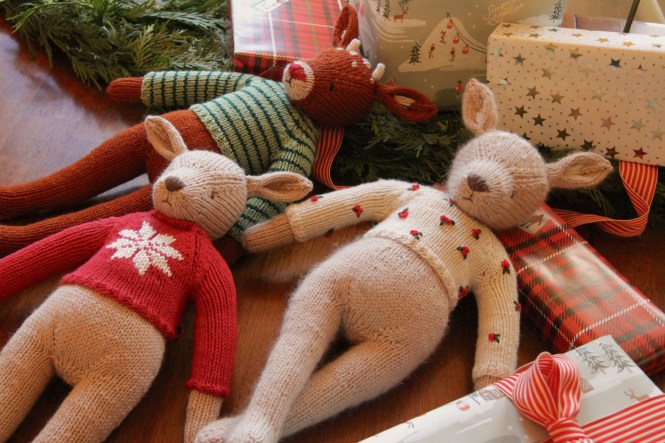
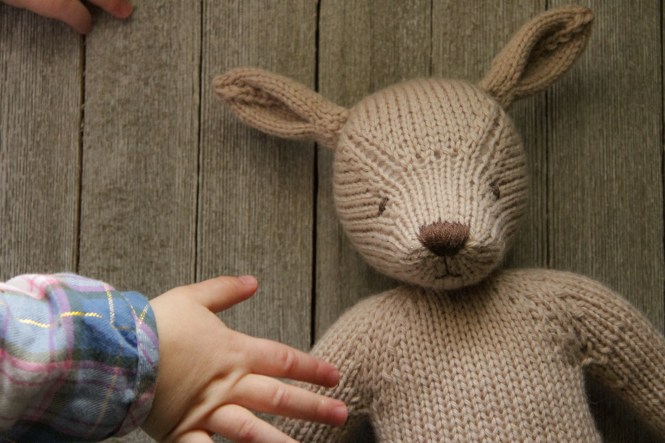
I may seem like a lucky jerk for being able to work from home. Sure, I know that I am very fortunate to be there for my kids, day in and day out. I’m raising them while working, and I’m so thankful for that. But I really don’t see ‘makers’ talk about the ugly side of this ‘industry’, the sometimes depressing side of it: the roadblocks, the cynicism, the doubts, the time invested, the rip-offs.  You see our nicely finished, hand-made item being held by a freshly-bathed babe on a beautiful antique quilt and you think “their life is so perfect, I hate them.”
Am I wrong? I don’t think I am because I am guilty of thinking the same about other makers.

But it’s far from perfect. Maybe in always putting our best foot forward, we kind of lost that personal connection with others. Maybe we’ve become un-relatable, though we are probably the most laid back, easy-to-get-along-with people.

So yeah, this line of work can be a big bummer at times. Have you ever worked for two years on a design, shown a sneak peek and said “coming soon!” as if you were going to have a stinking parade for yourself, then you find out a few days later that you are finally pregnant and you get sick? Like dead almost. I mean the kind where you lose 30 lbs in a month and are in and out of the hospital to get your fluids replenished because everything made you sick—crackers, water, air, Kleenex, you name it. And then that new pattern you should’ve had done before Valentine’s day is still in limbo come April because you haven’t been able to eat food for two months, much less count stitches.

When you are a ‘maker’ for a living, life can really put a hiatus on things.

And, when you’re finally able to eat, you demolish half a bag of tortilla chips with salsa and stare at a half-knitted doll dress and think “What am I doing with my life? I’m thirty-one, I should be knitting trendy chunky blankets or neon pink speckled shawls or something.” But the truth is, I don’t want to make either of those. I want to make dolls and knit sweet little baby sweaters and bonnets. But, I can’t even begin to tell you the number of times I have questioned what I’m doing. Ask my mom, she has about 1,743 text from me of half-finished projects and I’m asking, “is this stupid??”

Then, when you decide that the dolls you spent months making actually look stupid, and ‘who is gonna want that rabbit/grasshopper hybrid…’ (don’t even judge the fabric pile in the corner and the paint-swatch walls. That wall has since been painted and all that fabric has since been hidden from my husband)…


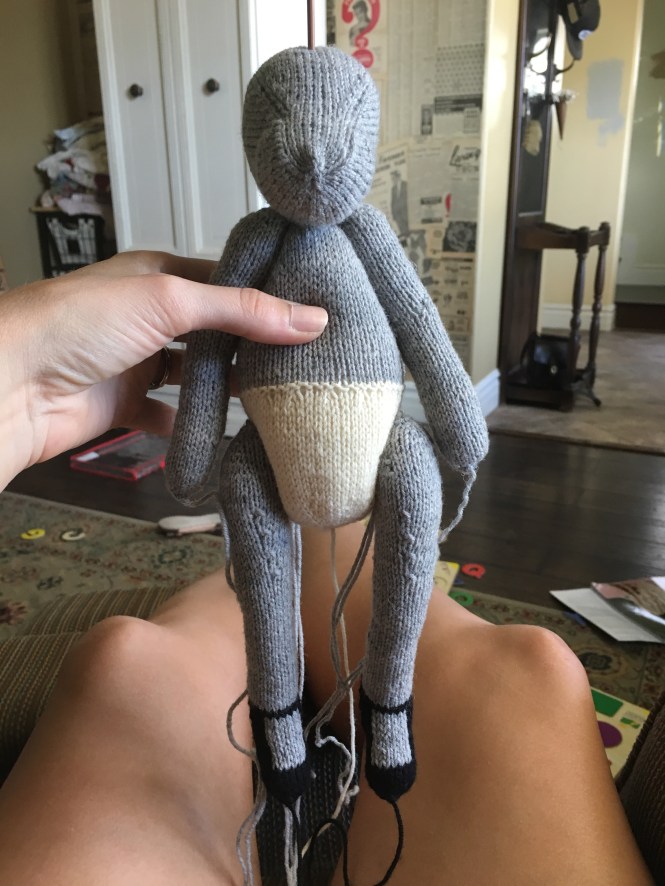
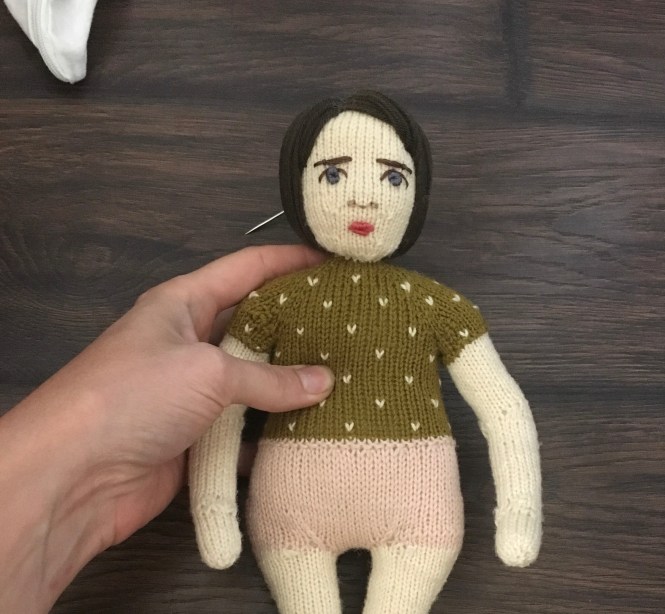
…and you toss that junk into a basket full of others, destined for the Island of Misfit Toys along with those dolls that only have hair stitched on half of their head; the ones who look like they should be named Olga and have a face that only your child will love:


And as if I wasn’t enough of a hindrance to myself, I get the ridiculous emails. You wouldn’t believe the kind of emails from people wanting us to make a whole pattern from an item we made 11 years ago so that they too can make it. Like we can just pull all that from memory… Or people, who have no intention of buying, request a complimentary 1”bear for their blind aunt, I kid you not. Would she tell the difference from the bear and a piece of lint?? Or the emails from people that don’t even care about the product you made but instead ask where they can buy the tea set in the background of your photo. The constant emails alone are enough to make me grey—you don’t earn a dime for your time dealing with that stuff.

I wish that was the worst of it. I think the worst is creating something from nothing, not earning nearly enough for your time, then seeing your design duplicated by someone who is making money off your idea, hand-over-fist.

You may see the perfection of the finished item, but boy does it take a long path to get there. I’m sure more venting will come.

Just know that if you’re a maker enduring these things, hang in there. You’re not alone.

Hugs,

Rhonda